 Save
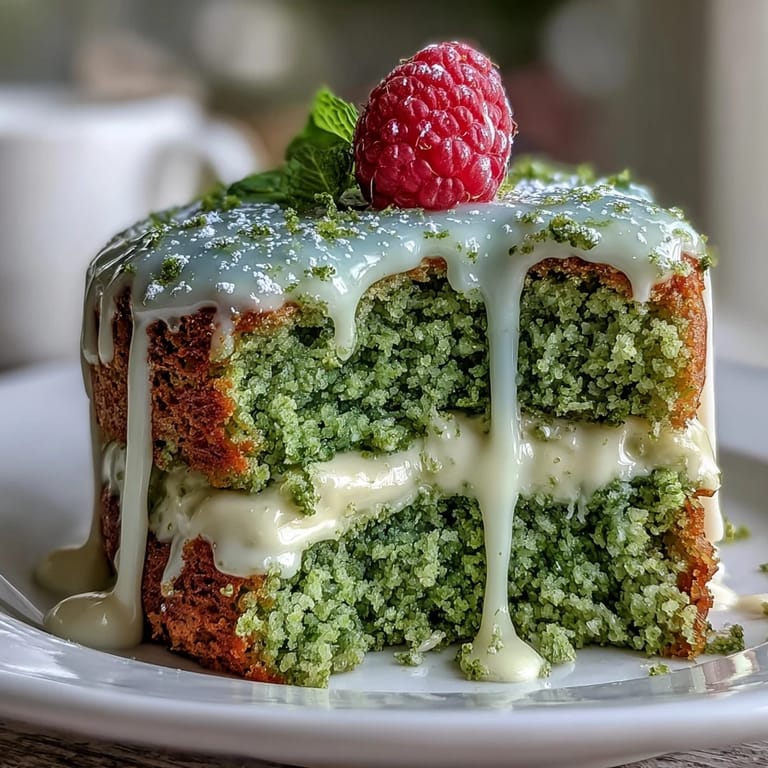
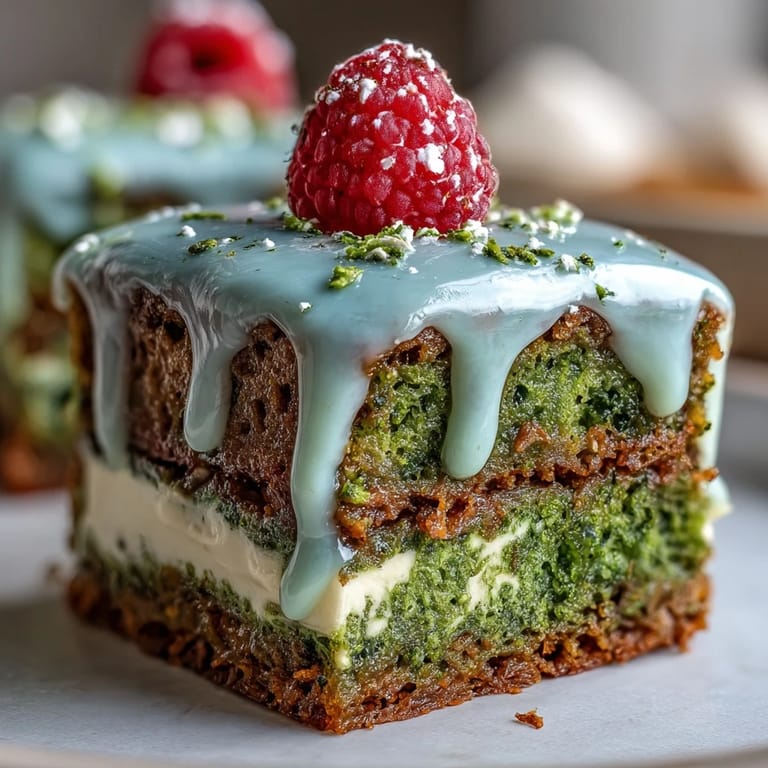
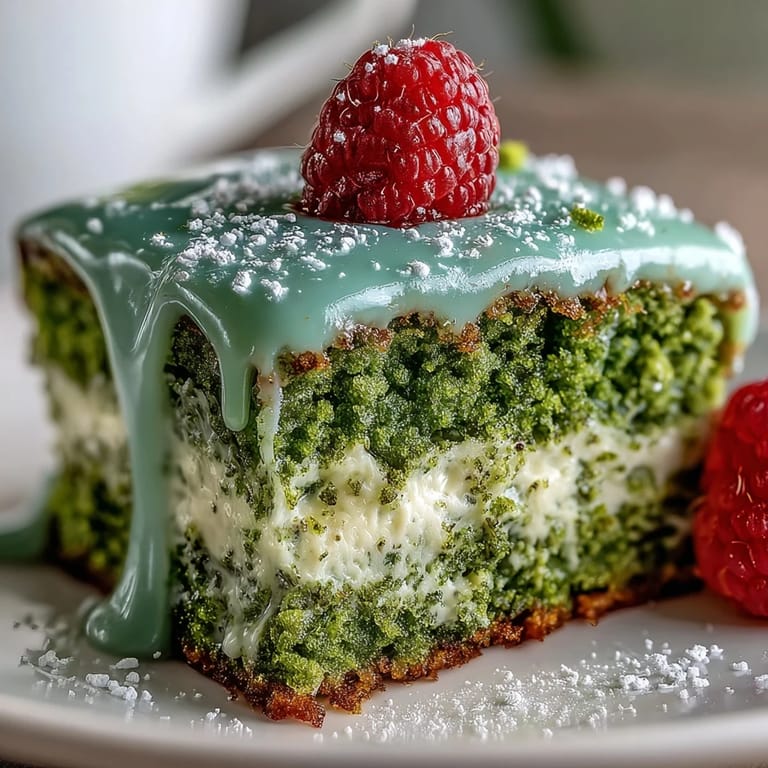
Save The first time I made this mini matcha smash cake, my kitchen filled with the earthy scent of green tea, dancing over the buttery vanilla notes as the layers baked. Testing new recipes doesn't always go so smoothly, but this one made me grin when the cake released in perfect little rounds from the pans. There’s something undeniably cheerful about decorating such a petite cake—it almost feels like crafting an edible centerpiece for a special brunch. And nothing beats that satisfying moment when the fork sinks into the soft, pale green crumb, revealing creamy frosting in between. Sometimes it’s the simplest ingredients, dressed up for a celebration, that spark the most joy.
One rainy Sunday, my friend Sam and I decided to celebrate nothing in particular except that we’d survived a long week. A casual text turned into a mini baking party, and as the cake cooled, we debated over sprinkles versus berries for decorations, laughing far too loudly for such a tiny treat. Smashing into the cake together—crumbs flying and frosting smudged—became one of those oddly memorable moments we still bring up over brunch. The kitchen was left a mess, but the clean plates made it all worth it.
Ingredients
- All-purpose flour: The base of a tender, fluffy cake—sift it well for a soft crumb and to avoid lumps.
- Granulated sugar: Sweetens and adds a touch of moistness; I learned not to reduce the sugar, or the matcha flavor feels too intense.
- Baking powder and baking soda: Both help the mini cake rise tall and light, so double-check they’re fresh before you start.
- Salt: Just a pinch brings out the nuanced notes in both the matcha and the vanilla frosting.
- Matcha powder (culinary grade): This is the star—choose a vibrant, bright-green matcha for the best color and taste, and sift it in to prevent clumps.
- Whole milk (room temperature): Adds richness and helps everything blend; using it at room temp keeps the batter smooth.
- Egg (room temperature): Adds structure and lightness—take it out of the fridge early so it mixes easily.
- Vegetable oil: Makes for a tender, moist crumb and is easier than creaming butter for this small batch.
- Vanilla extract: Adds warmth and depth both in the cake and frosting—pure vanilla is worth it.
- Unsalted butter (softened): Essential for creamy frosting; beating it well ensures it gets fluffy and pale.
- Powdered sugar (sifted): Gives the frosting its smooth, luxurious consistency—always sift to avoid any little lumps.
- Milk (for frosting): Just a splash helps whip the frosting into an easy-to-spread cloud.
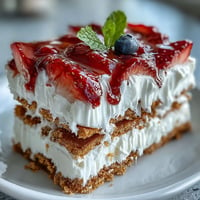
- Sprinkles or fresh berries: Optional, but they make the cake pop with color for a truly celebratory vibe.
Tired of Takeout? 🥡
Get 10 meals you can make faster than delivery arrives. Seriously.
One email. No spam. Unsubscribe anytime.
Instructions
- Prep your pans:
- Get two 4-inch cake pans greased and lined with parchment—the sound of paper smoothing out actually feels like a promise of no sticking.
- Mix dry ingredients:
- Inhale the subtle matcha aroma as you sift together the flour, sugar, baking powder, baking soda, salt, and matcha powder—the brighter the green, the better.
- Combine the wet stuff:
- Whisk the milk, egg, oil, and vanilla in a separate bowl until they look unified and silky.
- Unite wet and dry:
- Pour the liquids over the flour mixture and gently fold with a spatula—just enough to combine, leaving the batter soft and lump-free.
- Bake the layers:
- Divide the batter between your pans, smoothing the tops; the oven’s warmth brings out the faint aroma of cake and tea.
- Cool and release:
- Bake 15–20 minutes, then let the cakes rest before easing them out to cool completely on a wire rack; their tops should feel springy to the touch.
- Make the frosting:
- Beat softened butter until airy, then add the powdered sugar in stages, watching the frosting go from grainy to utterly smooth; splash in milk, vanilla, and a pinch of salt at the end.
- Layer and frost:
- Gently sandwich the cooled cakes together with frosting, then swirl more around the outside for that satisfyingly rustic look.
- Decorate and enjoy:
- Scatter sprinkles or fresh berries, slice—or smash—and share the mini masterpiece with friends.
 Save
Save  Save
Save I’ll never forget the time we added just a touch more matcha, and the cake came out the brightest jade green—it got as much attention as the birthday candles themselves. Everyone paused, just a beat, to admire the color before the ceremonial first slice (and inevitable giggle-filled smash) brought instant laughter.
Choosing Your Toppings
Picking the right topping is half the fun with this mini matcha cake. Sprinkles give it a party feel, while fresh berries add brightness and a little tart contrast to the sweet vanilla frosting. Sometimes, even a dusting of extra matcha on top adds an elegant, grown-up finish. No matter the route, decorations invite everyone to add their own festive spin.
Make-Ahead Brunch Magic
If you want a stress-free brunch, bake the cake layers the day before and wrap them in plastic to keep them soft. The frosting can also be made ahead—just let it come to room temp so it’s easy to spread. Assemble right before serving, and you’ve got a mini showstopper with zero morning rush attached.
Mistakes That Improved My Cake Game
Sometimes kitchen slip-ups pushed this recipe to its best version. Once, I tried swapping milk for a nut milk and found almond was the tastiest with the matcha notes. Not leveling my cake layers led to a quirky, rustic look we all loved.
- If in doubt, go heavy on the frosting between layers—it keeps things extra moist.
- A quick chill in the fridge can help set the frosting for cleaner slices.
- Let the cake fully cool before frosting to avoid melt disasters.
 Save
Save  Save
Save Sharing this little matcha smash cake has turned ordinary mornings into special celebrations every time. However you decorate or slice it, it’s bound to be remembered for both its flavor and the moments it creates.
Recipe FAQs
- → How can I intensify the matcha flavor?
Use a higher-quality culinary matcha and increase the powder slightly. Sifting matcha before mixing prevents lumps and ensures an even, vibrant green color without altering batter texture.
- → Any tips to avoid overmixing the batter?
Combine wet and dry ingredients until just incorporated; stop when streaks disappear. Overmixing develops gluten and can make the crumb dense instead of light and tender.
- → How do I get a smooth vanilla frosting finish on a small cake?
Chill the cake layers before frosting, apply a thin crumb coat, refrigerate to set, then apply the final layer with an offset spatula for clean edges and an even surface.
- → Can I make this dairy-free?
Swap the milk for plant-based milk and use vegan butter for the frosting. Texture may be slightly different; chill the cake well before slicing to help the crumb hold together.
- → What is the best way to store leftovers?
Keep covered at room temperature for the same day or refrigerate in an airtight container up to 48 hours. Bring to room temperature before serving to soften the frosting and restore tenderness.
- → Can the layers be made ahead or frozen?
Yes—cool layers completely, wrap tightly, and freeze unfrosted layers up to one month. Thaw in the refrigerator overnight before assembling and frosting.